
Introduction
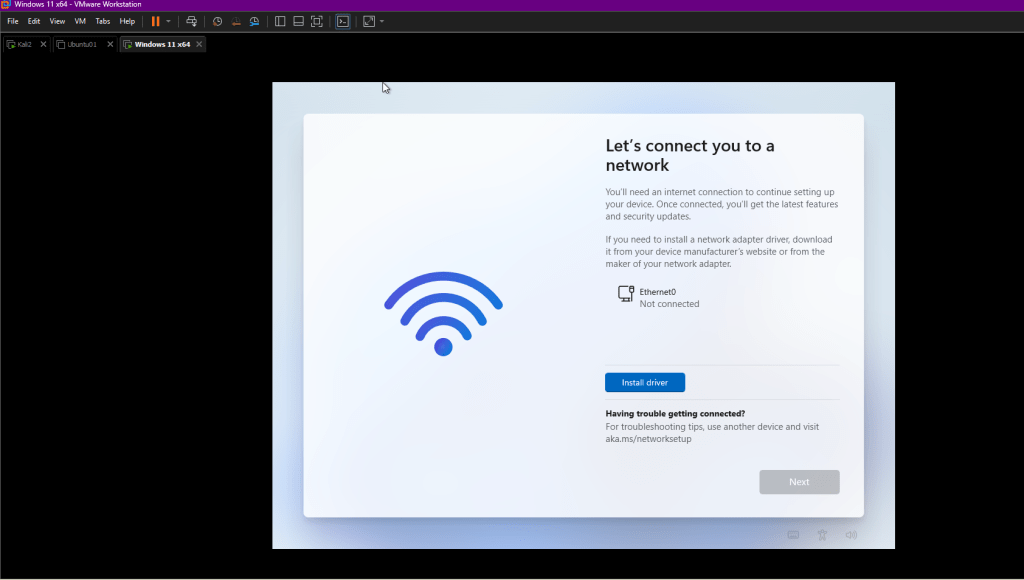
If you’ve ever tried installing Windows 11 in a VMware virtual machine (VM), you know the frustration: you reach the shiny “Let’s connect you to a network” screen, only to see “Ethernet0 – Not connected” and a prompt to install drivers that Windows setup simply can’t find. The “Next” button stays grayed out, and progress halts.
This happens because Windows 11 setup media doesn’t include native drivers for VMware’s high-performance virtual network adapters (like VMXNET3). Microsoft also enforces an internet connection during Out-of-Box Experience (OOBE) setup for most editions, which creates a perfect storm in VMs.
The good news? You can bypass this entirely and finish the installation offline with a local account—no Microsoft account forced on you. Here’s the step-by-step guide that works reliably in VMware Workstation (as of 2026).
Why This Happens in VMware VMs
- VMware uses virtual hardware that Windows doesn’t recognize out-of-the-box during setup.
- The preferred adapter (VMXNET3) requires drivers from VMware Tools, which you can’t install until after setup.
- Even emulated adapters (like E1000E) sometimes fail to auto-load in the installer.
- Microsoft’s policy requires internet for setup (to push Microsoft accounts and updates), but without drivers, there’s no connection.
The Easiest Fix: Bypass the Network Screen with OOBE\BYPASSNRO
This command is the fastest workaround—it’s been working since Windows 11 launched and still does in recent builds.
- Reach the Problem Screen
Proceed through language, region, and keyboard setup until you hit:
“Let’s connect you to a network”
(Your screenshot shows exactly this, with the Wi-Fi icon and “Ethernet0 – Not connected”.) - Open Command Prompt in Setup
Press Shift + F10 (or Shift + Fn + F10 on some keyboards/laptops).
A black Command Prompt window pops up. - Run the Bypass Command
Type the following exactly (case doesn’t matter, but use backslash):
OOBE\BYPASSNRO
Press Enter.
- What Happens Next
The VM restarts automatically and re-enters OOBE (you’ll redo region/keyboard briefly). - Skip the Network Step
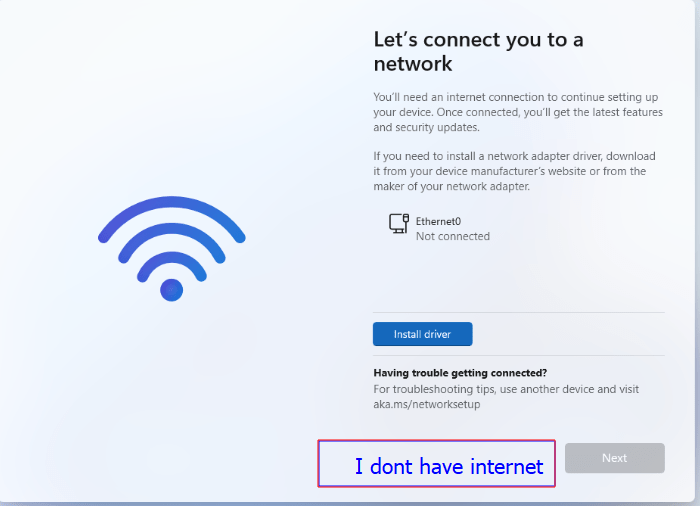
When you reach the network screen again, you’ll now see a new option:
“I don’t have internet” (or similar).
Click it → then “Continue with limited setup”.
- Create a Local Account
Proceed to set up a username, password (optional), security questions, etc. No Microsoft account needed! - Finish Installation
Complete the remaining steps—privacy settings, Cortana (if prompted), etc. You’ll boot to the Windows 11 desktop.
After Installation: Get Full Network Working with VMware Tools
Once you’re at the desktop:
- In the VMware Workstation menu (on your host machine):
VM → Install VMware Tools
This mounts the VMware Tools ISO as a virtual CD in the VM. - Inside the VM:
Open File Explorer → find the new CD drive (usually D: or E:) → run setup.exe (or setup64.exe).
Follow the wizard (Typical install is fine) → reboot when prompted. - Post-reboot perks:
- Proper network driver loads (Ethernet works with internet).
- Better mouse integration, full-screen resolution, copy-paste between host/guest, shared folders, etc.
Alternative: Provide the Driver During Setup (If You Want Internet Immediately)
If you prefer connecting during OOBE:
- Before starting the VM: Edit VM settings → Network Adapter → set to E1000E (emulated Intel—Windows often detects this natively).
- Or keep VMXNET3 and do this:
At the network screen → from VMware menu: VM → Install VMware Tools.
Wait for the CD to mount.
Click Install driver (blue button) → browse to the CD drive → navigate to drivers → vmxnet3 → Winx64 folder → select the .inf file.
It should load, connect, and let you proceed online.
But honestly? The bypass method is cleaner and faster for most people.
Pro Tips for Smooth VMware + Windows 11 VMs
- Use the latest VMware Workstation (check for updates—newer versions handle Windows 11 better).
- Set Network Adapter to NAT for easy internet (or Bridged if you need the VM visible on your LAN).
- After VMware Tools, install any Windows updates.
- If using Windows 11 ARM (e.g., on Apple Silicon via Fusion), the same OOBE\BYPASSNRO trick applies.
- Want to avoid Microsoft account entirely in future installs? Tools like Rufus can create modified ISOs that skip it from the start.
Conclusion
Getting stuck on the network screen in VMware is one of the most common Windows 11 VM headaches, but the OOBE\BYPASSNRO command makes it a non-issue. In under a minute, you’re past it and installing offline like the good old days.
Have you run into this recently? Drop a comment with your VMware version or any tweaks that worked for you—I’d love to hear!
Happy virtualizing!

Leave a comment